...
 Before running the commands above, make sure that the relevant Organizational Unit(OU) (in this example it is named Analog) exists in Active Directory. On a machine that can access the Active Directory Users and Computers snap-in, launch the Active Directory Users and Computers snap-in and verify that OU is present as shown in below screenshot:
| Panel |
|---|
|
| Caption |
|---|
| 0 | Figure |
|---|
| 1 | Verify OU is Present |
|---|
| 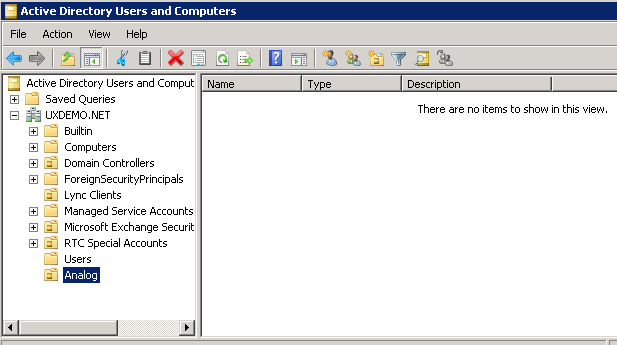 Image Modified Image Modified
|
|
- Launch the Lync Management Shell and run the relevant commands to create both Analog Phone and Analog Fax Endpoints as shown in below screenshot:
| Panel |
|---|
|
| Caption |
|---|
| 0 | Figure |
|---|
| 1 | Launch Lync Management Shell |
|---|
| 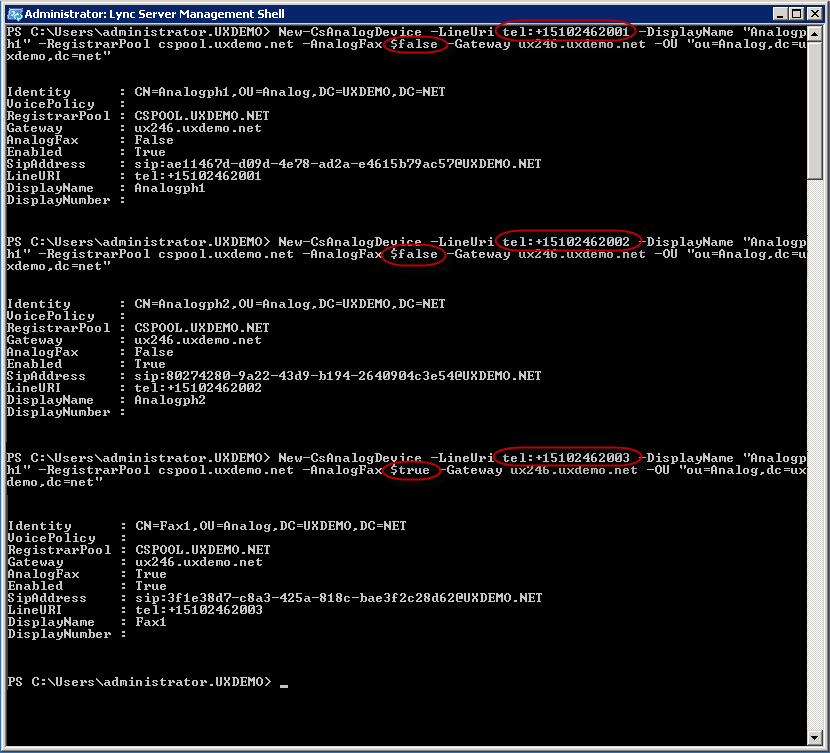 Image Modified Image Modified
|
|
- Verify in Active Directory Users and Computers snap-in that relevant users are created successfully in Analog Organizational Unit as shown below:
| Panel |
|---|
|
| Caption |
|---|
| 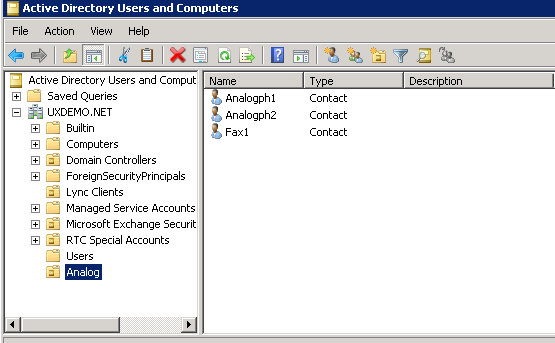 Image Modified Image Modified
|
|
Explanation of New-CsAnalogDevice
...
- Launch the Quintum Configuration Manager and connect to your Tenor Device
- Upon connecting to the device, Configuration Wizard will run automatically
- Follow the Wizard Steps and enter the relevant IP addresses, Analog Endpoint numbers..etc. as shown below
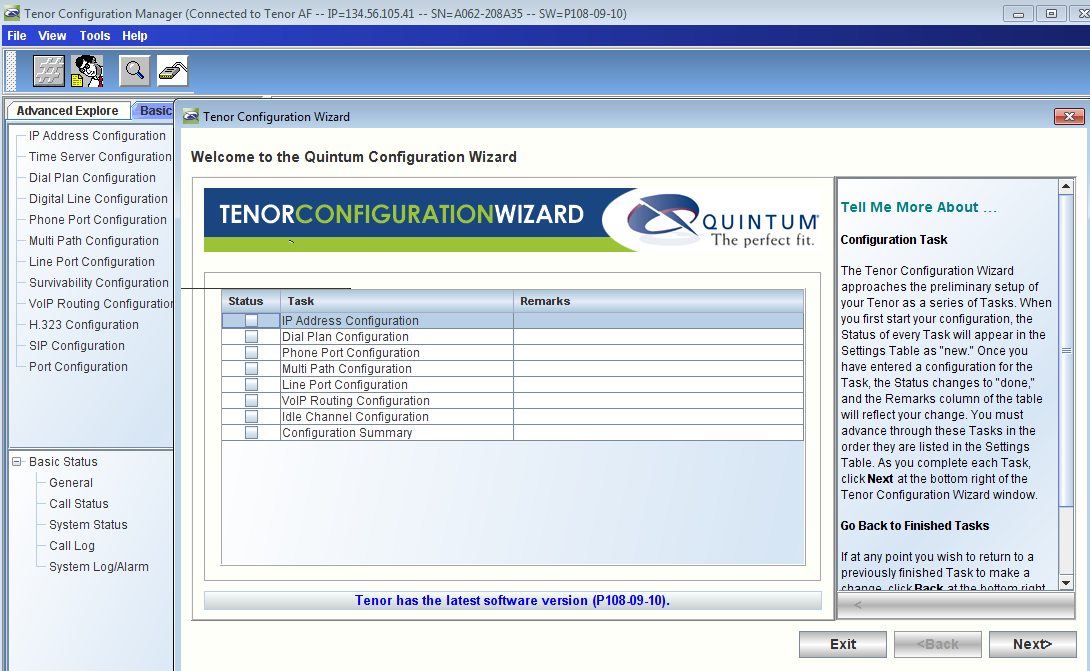 Image Removed Image Removed
|
- For this exercise we are using DHCP for the Tenor IP address configuration
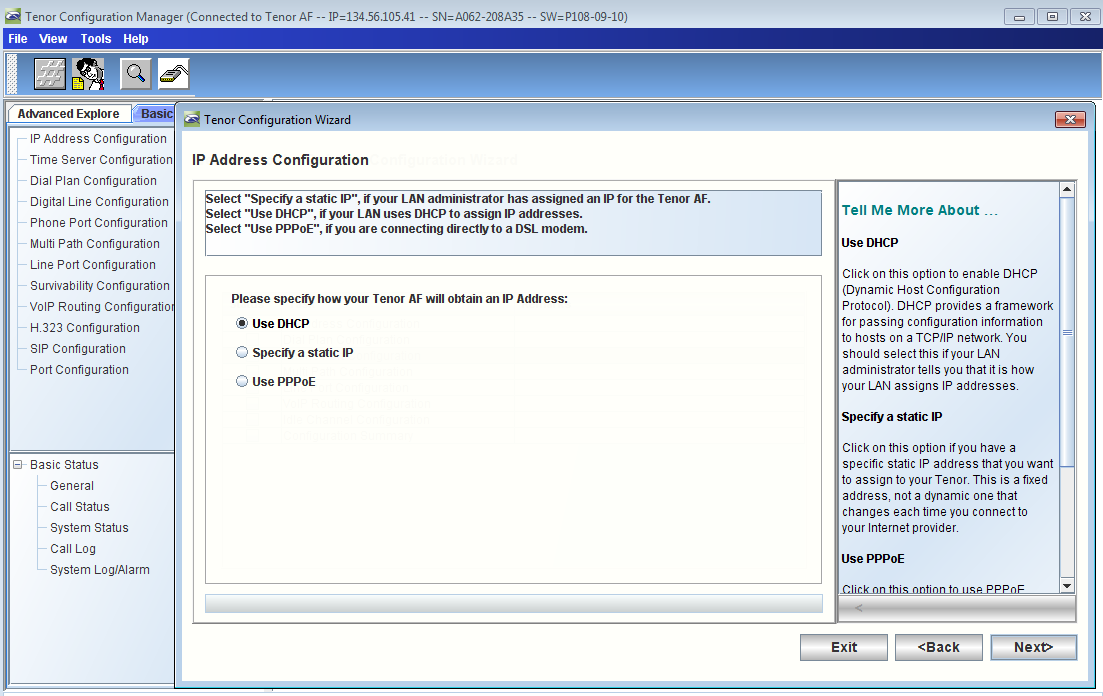 Image Removed Image Removed
|
| Panel |
|---|
|
| Caption |
|---|
|  Image Added Image Added
|
|
- For this exercise we are using DHCP for the Tenor IP address configuration
| Panel |
|---|
|
| Caption |
|---|
| 0 | Figure |
|---|
| 1 | IP Address Configuration - DHCP |
|---|
|  Image Added Image Added
|
|
- Enter the DNS IP address which is used in LYNC SBA Deployment Topology
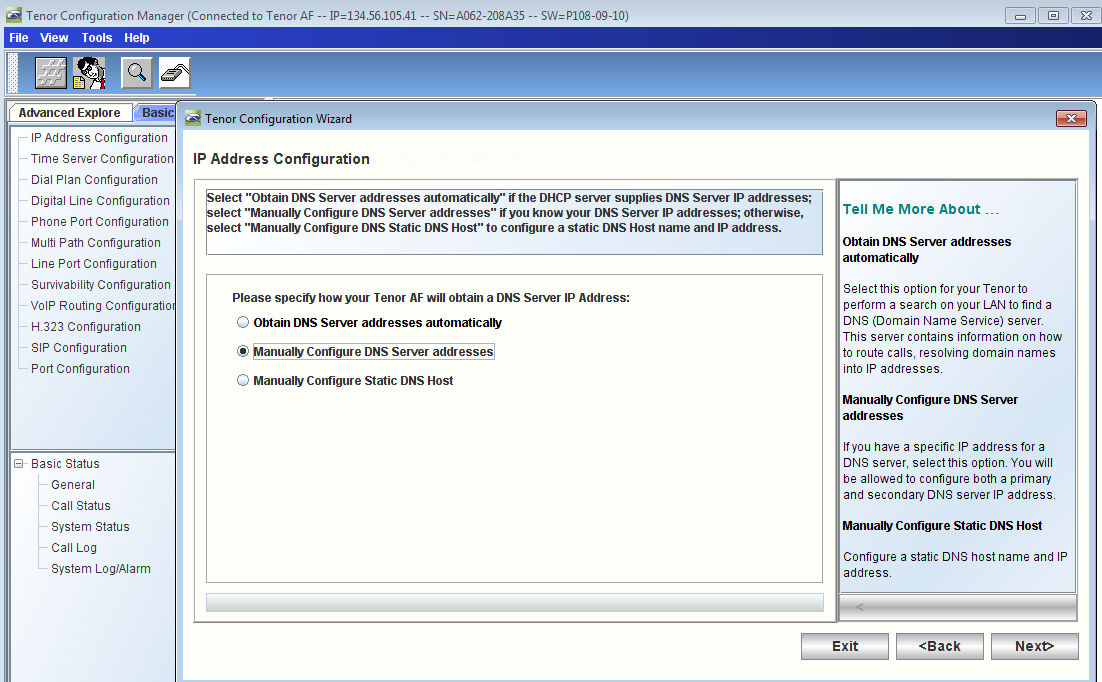 Image Removed Image Removed
|
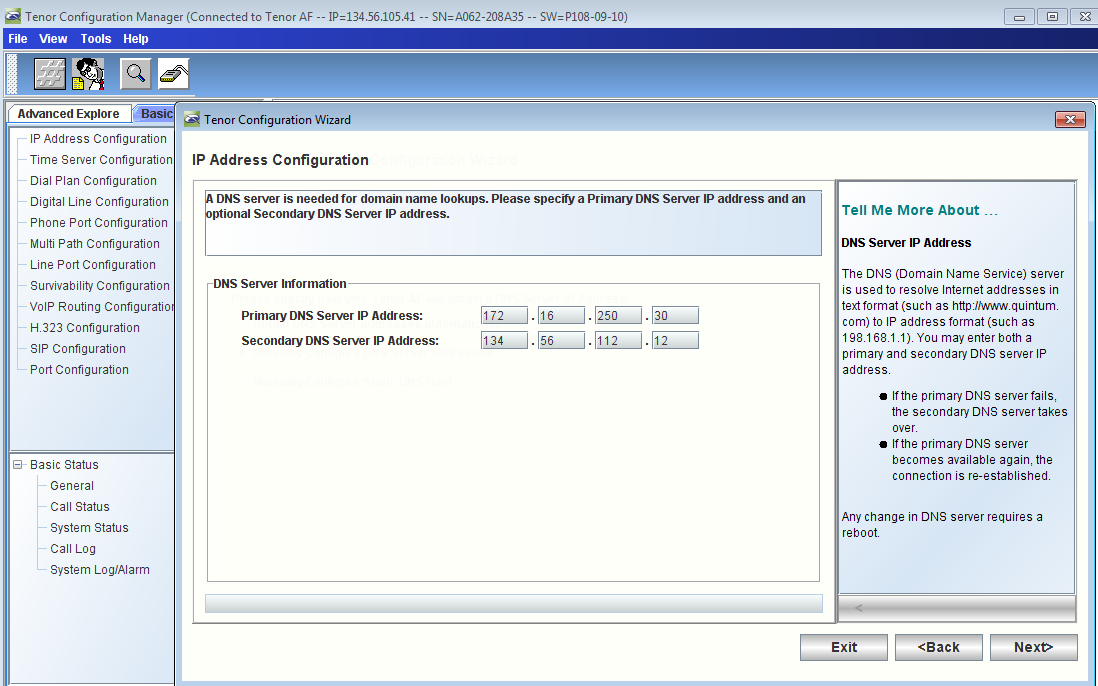 Image Removed Image Removed
|
- Verify that IP Address Configuration is completed as shown below
 Image Removed Image Removed
|
- Continue the wizard steps for Dial Plan Configuration
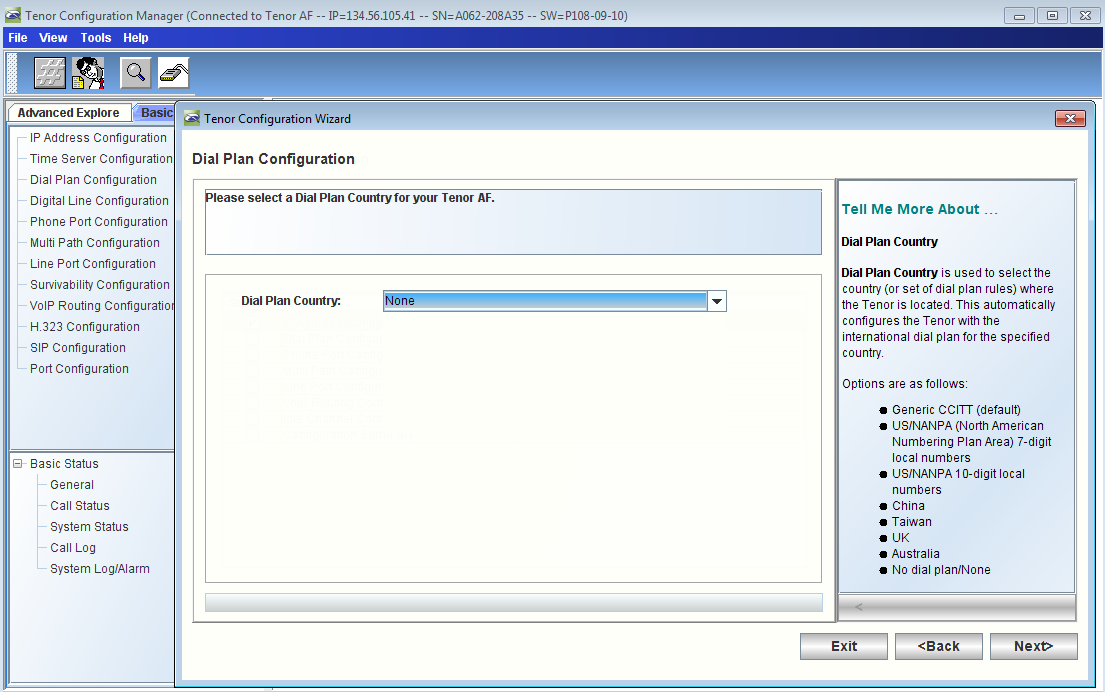 Image Removed Image Removed
|
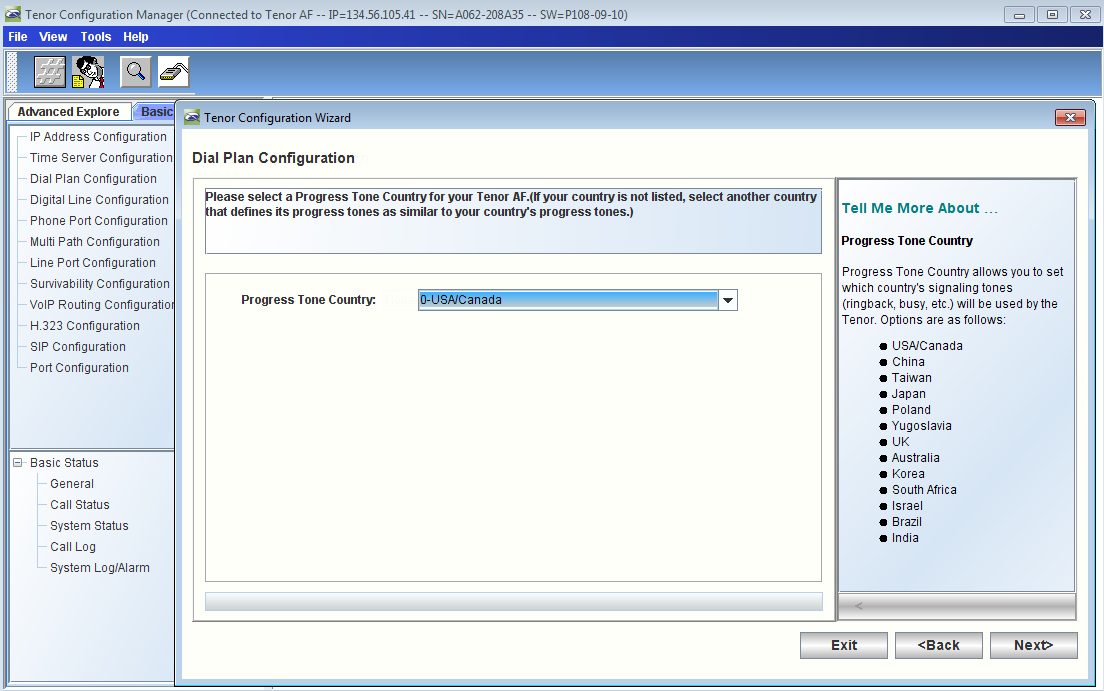 Image Removed Image Removed
|
| Panel |
|---|
|
| Caption |
|---|
| 0 | Figure |
|---|
| 1 | IP Address Configuration - DNS |
|---|
|  Image Added Image Added
|
|
| Panel |
|---|
|
| Caption |
|---|
| 0 | Figure |
|---|
| 1 | Enter DNS IP Address |
|---|
|  Image Added Image Added
|
|
- Verify that IP Address Verify that Dial Plan Configuration is completed as shown below
 Image Removed Image Removed
|
- Continue the wizard steps for Phone Port Configuration
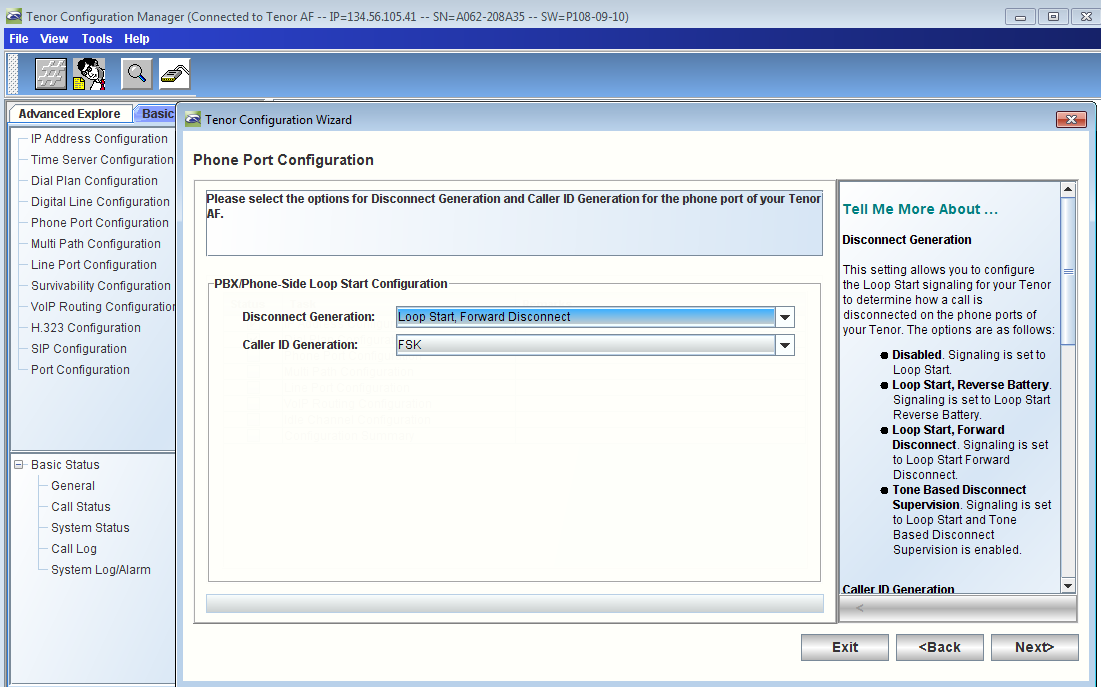 Image Removed Image Removed
|
- Enter the relevant Phone Number/Extension (in this example we are using 2001 and 2002 users for the Analog phone endpoints)
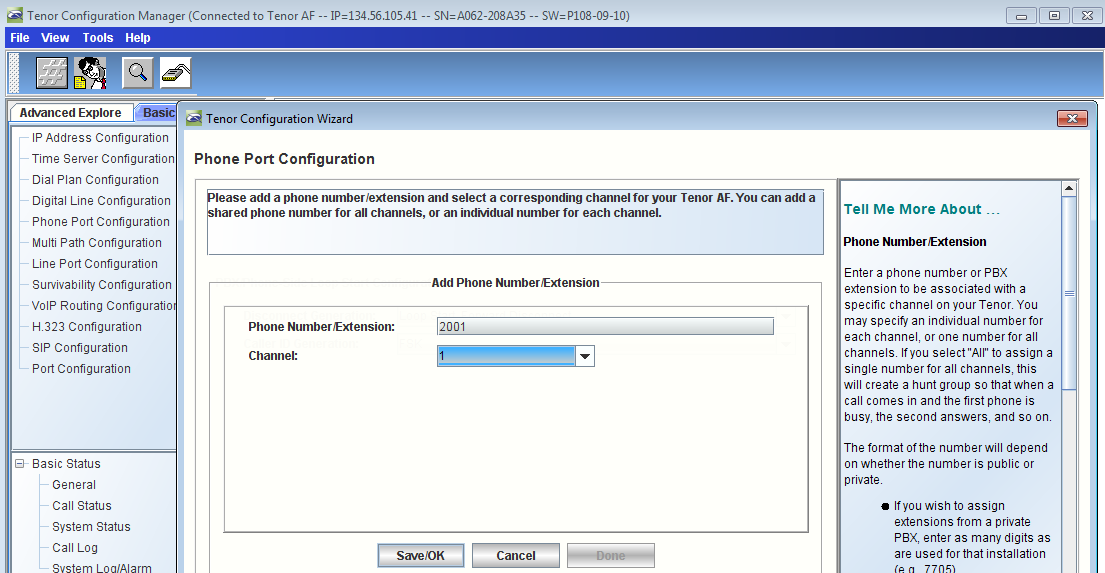 Image Removed Image Removed
|
...
| Panel |
|---|
|
| Caption |
|---|
| 0 | Figure |
|---|
| 1 | Verify IP Address Configuration |
|---|
|  Image Added Image Added
|
|
- Continue the wizard steps for Dial Plan Configuration
| Panel |
|---|
|
| Caption |
|---|
| 0 | Figure |
|---|
| 1 | Dial Plan Country |
|---|
|  Image Added Image Added
|
|
| Panel |
|---|
|
| Caption |
|---|
| 0 | Figure |
|---|
| 1 | Progress Tone Country |
|---|
|  Image Added Image Added
|
|
- Verify that Dial Plan Configuration is completed as shown below
| Panel |
|---|
|
| Caption |
|---|
| 0 | Figure |
|---|
| 1 | Verify Dial Plan Configuration |
|---|
|  Image Added Image Added
|
|
- Continue the wizard steps for Phone Port Configuration
| Panel |
|---|
|
| Caption |
|---|
| 0 | Figure |
|---|
| 1 | Phone Port Configuration |
|---|
|  Image Added Image Added
|
|
- Enter the relevant Phone Number/Extension (in this example we are using 2001 and 2002 users for the Analog phone endpoints)
| Panel |
|---|
|
| Caption |
|---|
| 0 | Figure |
|---|
| 1 | Enter Phone Number/Extension - 2001 |
|---|
|  Image Added Image Added
|
|
| Panel |
|---|
|
| Caption |
|---|
| 0 | Figure |
|---|
| 1 | Enter Phone Number/Extension - 2002 |
|---|
| 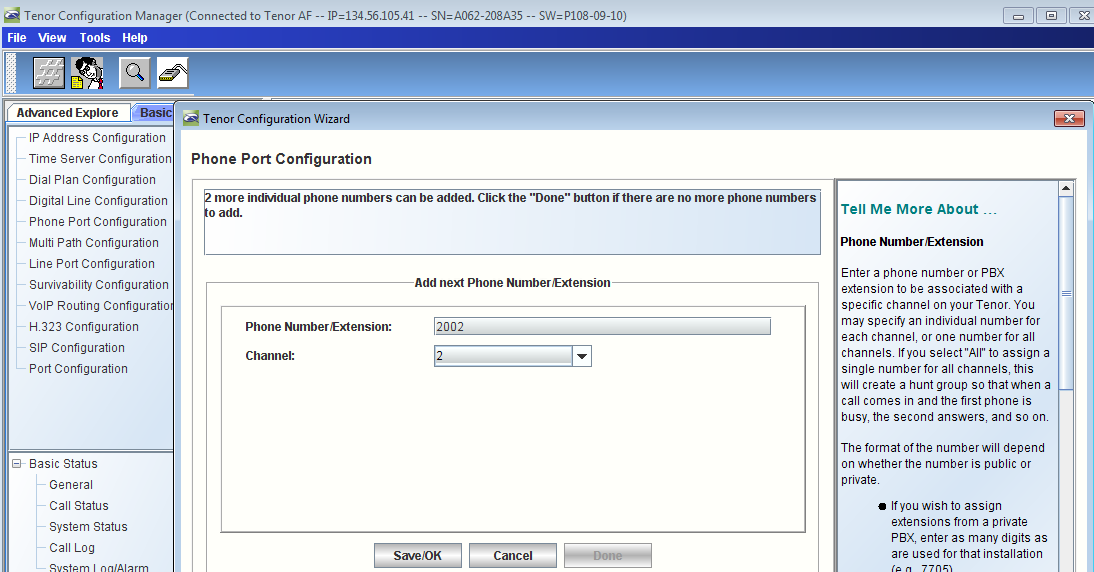 Image Added Image Added
|
|
- Hit on "Save/OK" and then the "Done" buttons
| Panel |
|---|
|
| Caption |
|---|
| 0 | Figure |
|---|
| 1 | Add Phone Number/Extension |
|---|
|  Image Modified Image Modified
|
|
| Panel |
|---|
|
| Caption |
|---|
| 0 | Figure |
|---|
| 1 | Configured Phone Number/Extension |
|---|
|  Image Modified Image Modified
|
|
- Verify that Phone Port Configuration is completed as shown below
...
Before running the commands above, make sure that the relevant Organizational Unit(OU) (in this example it is named Analog) exists in Active Directory. On a machine that can access the Active Directory Users and Computers snap-in, launch the Active Directory Users and Computers snap-in and verify that OU is present as shown in below screenshot:


